5 Classic Tie Dye Techniques
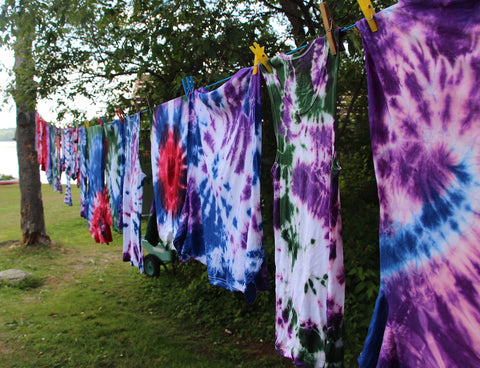
Summer is the perfect time to enjoy tie dyeing. There are many tried & true techniques to add a splash of colour to fabric. You don't need to be a master dyer to try the Bullseye, Spiral (or swirl tie dye), Stripe, Heart or 'no-tie' Folded Dyeing methods. Once familiar with these designs, you can use the basic concepts to make new shapes.

When tie dyeing, colours blend into one another to create new hues and interesting designs. You can get great results with primary colours (red, yellow or blue) since they can combine to make secondary colours (orange, green and purple). You can also experiment with complementary colours that are opposite on the dye colour wheel (orange & blue or red & green).
Bullseye Tie Dye
The classic bullseye design will look great on a T-shirt, pillow slip or napkin.
- Start with clean, damp fabric and prepare dye solution as usual.
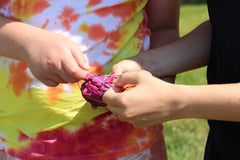
- Decide where your centre is; measure and mark with tailors chalk or simply eyeball it. Pinch and gather centre of fabric into a long tube.
- Pull fabric with your hand and secure together with rubber bands or string (rubber bands or string create colour divisions that will show the original colour of fabric).
- Dye fabric: use a spray bottle, squirt bottle or dip dye into a dye bath (try alternating primary, secondary or complementary colours or any other combination).
- Cover dye with plastic wrap and set aside for a few hours or overnight to set.
- Rinse fabric until water runs clear.
- Wash and dry fabric as usual, you may also set design with a warm iron if preferred.
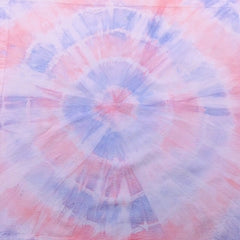
Spiral Tie Dye

The spiral design will look great on a T-shirt, dress, tote or use for a fun summer tablecloth.
- Start with clean, damp fabric and prepare dye solution as usual.
- Decide where your spiral centre is (mark it or simply eyeball the general area). Pinch or gather fabric and twist into a spiral shape.
- Secure spiral with string or large rubber bands to create wedges (or sections) for your design (rubber bands or string create colour divisions that will show the original colour of fabric).
- Dye fabric: use a squirt bottle or dip dye into dye bath, make sure to flip over spiral for other side (try alternating primary, secondary or complementary colours or any other combination).
- Cover dye with plastic wrap and set aside for a few hours or overnight to set.
- Rinse fabric until water runs clear. Wash and dry fabric as usual, you may also set design with a warm iron if preferred.
Striped Tie Dye
Stripes look great on everything so you can have fun creating new designs by adjusting the size and location; horizontal and vertical stripes can create totally different looks on the same sized fabric.
- Start with clean damp fabric and prepare dye solution as usual.
- Decide if you prefer horizontal or vertical stripes and how wide you want them to be (have stripes all the same width or make them different sizes). Mark where stripes begin and end (or just eyeball their general location).
- Pleat fabric together tightly with your hands and use rubber bands or string to secure (rubber bands or string create colour divisions that will show the original fabric colour).
- Dye fabric: use a spray bottle, squirt bottle or by dip dye into a dye bath (try alternating primary, secondary or complementary colours or any other combination).
- Cover dyed fabric with plastic wrap and set aside for a few hours or overnight to set.
- Rinse fabric until water runs clear. Wash and dry fabric as usual, you may also set design with a warm iron if preferred.
Heart Tie Dye
Not just for Valentines Day heart tie dye designs look great in a variety of applications. Use a heart to add impact to a T shirt, tote, apron or pillow slip anytime of the year -- the basic design idea is similar to the bullseye.
- Start with clean, damp fabric and prepare dye solution as usual.
- Using folded craft paper, draw or trace a paper heart pattern in a suitable size for your fabric. Cut pattern in out with scissors and open to see if you like the shape, if not adjust pattern as necessary.
- Fold fabric in half and decide where to place the heart; the heart design looks great radiating from the centre of a T-shirt, but you can place it wherever you prefer.
- Trace folded heart pattern along centre fold of your fabric with coloured chalk.
- Pleat fabric together tightly along tracing line with your hands, and use rubber bands or string to secure (rubber bands or string create colour divisions that will show the original fabric colour).
- Dye fabric: use a spray bottle, squirt bottle or by dip dye into a dye bath (try alternating primary, secondary or complementary colours or any other combination).
- Cover dye with plastic wrap and set aside for a few hours or overnight to set.
- Rinse fabric until water runs clear. Wash and dry fabric as usual, you may also set design with a warm iron if preferred.
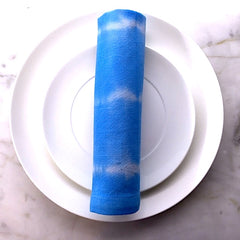
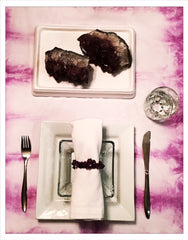
Folded No-Tie Dye
This is an easy DIY project to do for napkins, placemats, table cloths, pillowcases or even T-shirts. No extra supplies like elastic bands or string is needed -- truly easy even for beginners!
- Start with clean damp fabric and prepare dye solution as usual.
- Fold fabric in half, fold again and again so you have many layers (try 6, 8 or 10 depending on fabric thickness)
- Dye fabric: apply dye solution evenly to folded edges with a plastic squirt bottle. Saturate both sides of your folded fabric edges (use just one colour or try alternating primary, secondary or complementary colours or any other combination).
- Cover dye with plastic wrap and set aside for a few hours or overnight to set.
- Rinse fabric until water runs clear. Wash and dry fabric as usual, you may also set design with a warm iron if preferred.


