Dyeing Wood
We dyed plain wood clothespins red for crafts and decor. 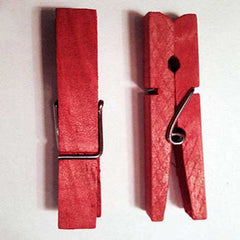 Dye transforms unfinished wood beyond the usual stains and 'dye-staining' wood products is fun, affordable & easy. A wide range of looks can be achieved by using the materials you probably already have at home.
We used the immersion dyeing technique for the wooden clothespins. Choose a paintbrush, sponge, roller, immersion, spray or stencil dyeing technique. You can protect your work by adding polyurethane or you may choose to sand and leave as is. Each dyeing method will give a totally different personal style.
Tips for Dyeing Wood with Fabric Dye
- Tintex is an all-purpose water based dye that always allows the natural grain to shine
- Dye is versatile, stain unfinished wood products to match any colour; compliment the soft furnishing and fabric colours already in your space
- Dye adds character without chipping or peeling; wood easily absorbs dye dissolved in hot water
- Reuse extra dye for a wood project by reheating (store extra solution in glass jars)
- Softwoods may absorb more colour; hardwoods may use more dye
- More layers of dye added produces brighter or more intense colours, Less dye produces lighter colours
- Finish faster with wicker: no need to sand wicker after applying polyurethane
The rustic look may appeal to a more casual space or even a modern industrial loft. Brushing on dye is easy for a traditional look. A stencil adds character to a plain piece of wood. A spray of dye solution will produce an abstract look that you can rub in to soften. The dipping or immersion method is an easy fast-track to an ombre look; it can also be used for an all-over colour update.
Brush/Sponge/Roller Dyeing Technique
- Ideal for dyeing larger amounts of wood products
- Use a bristle or sponge brush foam roller, or scrap fabric
- Apply to solution & evenly spread over entire surface
- Sanding wood immediately reduces unwanted drips or dyeing errors
- Air dry and repeat process again to get desired shade
- (Optional) Seal with up to 2 coats of polyurethane with a clean brush. Use fine sandpaper lightly between coats. Remove dust with a cloth and air dry
Dipping & Immersion Dyeing Technique
- Ideal for dyeing smaller amounts of wood products (like clothespins)
- Dip or submerge article for up to 20 minutes
- Check wood every 5 minutes by stirring dye bath or rotating
- (Optional) Seal with up to 2 coats of polyurethane with a clean brush. Use fine sandpaper lightly between coats. Remove dust with a cloth and air dry
Spray Dyeing Technique
- Ideal for an abstract look
- Fill a spray bootle with dye solution
- Spray dye solution over the article to create different patterns
- Let set for 10 through 20 minutes and pat excess off with a scrap piece of fabric
- (Optional) Seal with up to 2 coats of polyurethane with a clean brush. Use fine sandpaper lightly between coats. Remove dust with a cloth and air dry
Stencil Dyeing Technique
- Apply stencil with tape
- Use a brush or roller to apply dye, blotting excess
- Apply dye toward the centre and work outward
- After a couple of minutes remove stencil and air dry
- (optional) Seal with up to 2 coats of polyurethane with a clean brush. Use fine sandpaper lightly between coats. Remove dust with a cloth and air dry
Rustic Dyeing Technique
- Best for a well loved, antiqued look
- Looks equally as appealing in a traditional country setting or a modern clean-lined space
- For a layered look with lots of character, use more than one colour
- The 1st colour should be light the 2nd colour darker
- Apply 1st colour to entire article with a brush, sponge, roller or scrap fabric cloth and air dry
- Apply 2nd colour over 1st colour, and air dry
- Gently sand entire article
- Repeat dye coats using the darker colour to accent an edges
- Dry completely between coats and lightly sand to create different textures and colour intensity to mimic wear
- (Optional) Seal with up to 2 coats of polyurethane with a clean brush. Use fine sandpaper lightly between coats. Remove dust with a cloth and air dry


